



















Exhaust tip install guide
This blog post is called "DIY Exhaust Tip Installation: What You Need to Know," and it's meant to help visitors who are considering buying an exhaust tip but aren't sure if they can install it themselves. The goal is to build trust before purchase and gently push traffic toward the exhaust tips category page.
Garage Notes / Installation
DIY Exhaust Tip Installation: What You Need to Know
A straight answer on whether you can do this in your driveway, what it actually takes, and how to not mess up a $60 part with a $5 mistake.
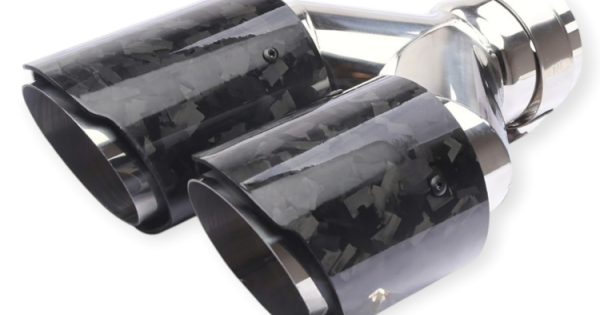
Somewhere between "it's just a chrome tube" and "you need a welder and a lift," most people give up on installing their own exhaust tip and either pay a shop $80 for a ten-minute job or never do it at all. Neither one needs to happen. Most exhaust tips are a bolt-on job you can finish on a Saturday morning with tools you probably already own—you just need to know which kind you're dealing with before you order one.
This is the guide we wish existed before we started selling these things. It covers how to tell a bolt-on tip from a weld-on tip, how to measure your existing pipe so you don't guess and get it wrong, the actual tools involved, a step-by-step for the install itself, and the handful of mistakes that turn an easy upgrade into a rattling, crooked mess.
Why Bother With an Aftermarket Exhaust Tip?
The honest answer is that most people do it for the look. A worn, dull, or rusted factory tip is one of those small details that quietly ages a car, especially once winter road salt gets at it. Swapping it for a clean stainless or black ceramic tip is one of the cheapest ways to change how the back of your car reads — right up there with a set of new emblems or a fresh set of decals.
There's a sound argument too, if your setup allows it. A larger diameter tip or a different internal shape can slightly change the exhaust note, though don't expect miracles from the tip alone—the muffler and resonator do the heavy lifting there. If you're chasing sound, a tip is the finishing touch, not the fix.
Either way, it's one of the highest-impact, lowest-effort upgrades in the whole accessories category. That's exactly why it's worth doing right.
Bolt-On vs. Weld-On: Know Before You Buy
This is the fork in the road, and it decides whether this is a driveway job or a trip to a muffler shop. Both types look identical once installed — the difference is entirely in how they attach.
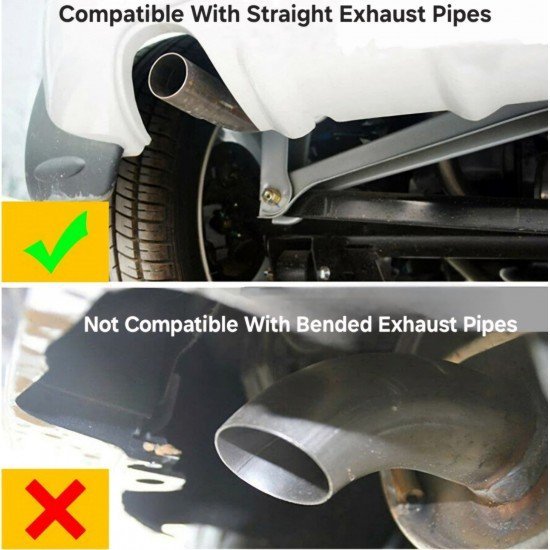
Bolt-on tips clamp onto your existing exhaust pipe using a set screw or hex bolts built into the tip itself. No cutting, no welding, no exhaust shop. This is what "DIY exhaust tip installation" almost always means, and it's what we'll walk through below.
Weld-on tips have no clamping mechanism — they're designed to be welded directly onto the pipe for a completely seamless, gap-free look. These are the choice for a show-car finish, but they're not a driveway project unless you own a MIG or TIG welder and know your way around exhaust-grade stainless steel. If you've got a tip like this, this guide will still help you with sizing and prep, but the final step belongs to a shop.
Fig. 1 — Bolt-on tips clamp on with screws; weld-on tips need a welded joint and belong with a muffler shop.
Get Your Sizing Right First
This is the step people skip and the reason most returns happen. An exhaust tip is described by two measurements, and mixing them up is the single most common ordering mistake:
- Inlet diameter — the opening that slides onto your existing exhaust pipe. This has to match your car's actual pipe, not the size you wish it were.
- Outlet diameter — the visible, finished end. This is the "look" measurement, and it's mostly personal preference within reason.
To find your inlet size, measure the outside diameter of your current exhaust pipe with a tape measure or calipers, right where the tip will sit. Round to the nearest common size—most passenger vehicles fall between 1.75" and 2.5". If you're in between two sizes, size down and rely on the tip's built-in clamp to take up the slack, rather than sizing up and fighting a loose fit.
Also check your overhang — how far the tip will stick out past your bumper — and your rear clearance, especially if your car has a diffuser or dual exhaust. A tip that looked perfect in photos can sit crooked or too low once it's actually hanging off your specific bumper cut.
Tools You'll Actually Need
For a standard bolt-on install, the tool list is shorter than most people expect. Nothing here requires a trip to a specialty store.
Driveway Toolkit
If your car is low to the ground, ramps or jack stands make this ten times easier than lying flat and reaching blind. Never rely on a jack alone to hold the car up while you're underneath it—that's the one step in this whole job that isn't optional.
Step-by-Step: Installing a Bolt-On Exhaust Tip
Once the car has cooled down completely—exhaust pipes hold heat far longer than you'd think—the install itself is genuinely quick.
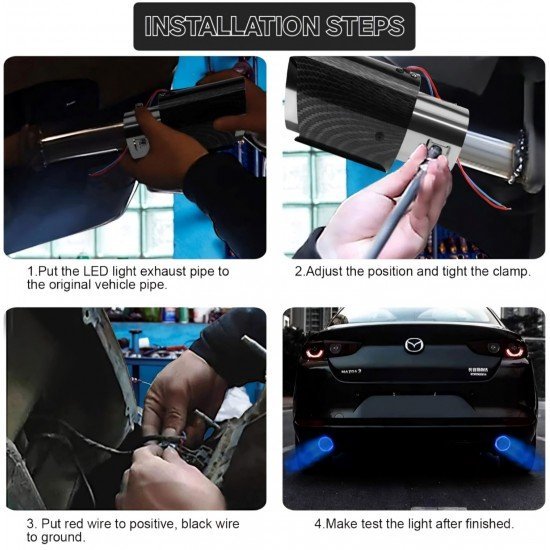
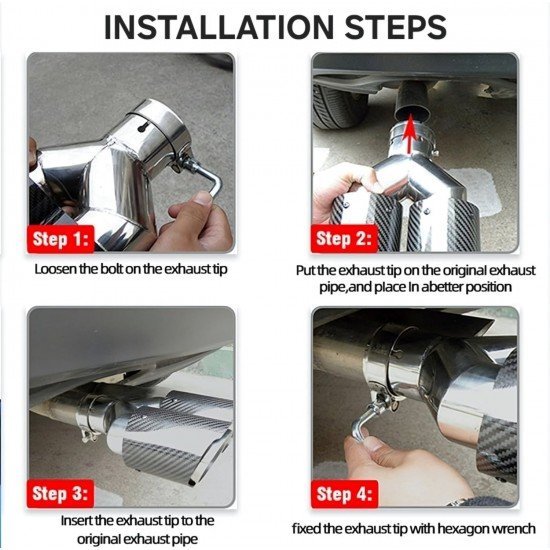
Fig. 2 — The full sequence for a bolt-on install, start to finish.
1. Clean the pipe end
Scuff off any surface rust, carbon buildup, or old gasket residue from the last inch or two of your factory pipe with a wire brush. The tip needs to grip clean, round metal—corrosion under the clamp is the top reason tips work loose or sit crooked.
2. Loosen the tip's clamp screws
Back off the set screws or hex bolts on the new tip enough that it slides on without forcing it. Don't remove them all the way—you'll want them started so you're not fishing for a stripped hole later.
3. Slide the tip on and set your overhang
Push the tip onto the pipe and decide how far it should extend past your bumper—usually somewhere between half an inch and an inch and a half looks proportional, but check a few reference photos of your specific model if you're unsure. This is also the moment to confirm it clears your bumper cutout with room to spare.
4. Level it and check the gap
Eyeball the tip from directly behind the car, not from the side — that's the angle everyone else will see it from. It should sit level with the ground, centered in the bumper cutout, with even clearance on both sides. Small adjustments now save you from redoing this later.
5. Torque the bolts and recheck once cold
Snug the clamp screws down evenly, alternating between them rather than fully tightening one at a time—this keeps the tip from getting pulled off-center. Don't overtighten; stainless bolts strip easier than you'd expect. Take it for a short drive, let it cool completely, and recheck the bolts once more—vibration loosens new installs faster than almost anything else on the car.
Common Mistakes That Ruin a Good Install
Most botched exhaust tip jobs aren't caused by a hard step—they're caused by skipping an easy one.
- Working on a hot exhaust. Give it at least an hour after driving. This isn't just about comfort—it's a real burn risk.
- Guessing the inlet size instead of measuring. "It looked about right" is how half of all exhaust tip returns happen.
- Skipping the pipe cleaning step. Rust and carbon under the clamp are the number one cause of a tip that slowly rotates or slides out of position over a few weeks.
- Over-tightening the set screws. Cracked welds and stripped screws come from muscling a clamp far past snug.
- Not double-checking the level from behind the car. A tip that looks straight from the side can be visibly crooked from directly behind—the one angle that actually matters.
- Never rechecking the bolts. Heat cycling loosens hardware. A five-minute recheck after your first drive prevents a rattle—or worse, losing the tip entirely.
Keeping It Looking Sharp After Install
A little upkeep goes a long way, especially if you're driving through a Canadian winter. Road salt is brutal on anything chrome-plated, so rinse the tip along with the rest of the undercarriage during winter washes. For stainless or chrome finishes, a dedicated metal polish every few weeks keeps heat discoloration from setting in—a light coat of polish also adds a thin protective layer against moisture. For black ceramic or coated tips, stick to a gentle wash; heavy polishing compounds can wear the coating thin over time.
It's also worth a quick monthly bolt check for the first couple of months, then every oil change after that. It takes thirty seconds, and it's the difference between owning the tip for years and finding it in a parking lot.
Frequently Asked Questions
Can I install an exhaust tip without removing my muffler?
Yes, in almost every case. A bolt-on tip slides directly over your existing tailpipe — no need to drop the muffler or disconnect anything.
Will a new exhaust tip make my car louder?
Slightly, if at all. The tip changes tone more than volume. If you're after a noticeably louder or deeper sound, that comes from the muffler and resonator, not the tip.
What if my inlet size is between two standard sizes?
Size down and let the clamp take up the difference — it's designed for a small range, not an exact match. Sizing up leaves you with a loose fit no amount of tightening will fully fix.
Do I need to disconnect the battery or do anything else safety-wise?
No electrical disconnection needed — this is a purely mechanical job. The only real safety rules are a fully cooled exhaust and a car that's properly supported on stands or ramps, never a jack alone.
Find the Right Tip for Your Ride
Every exhaust tip in our shop lists its exact inlet and outlet diameter up front, so you can size it right the first time.
Shop Exhaust TipsFree shipping across Canada & the U.S. on qualifying orders
Leave a Comment